
Adding Animations compatible with DEXR
If you are completely new to animating in Blender, we'd recommend also checking out the official blender resources such as

Overview
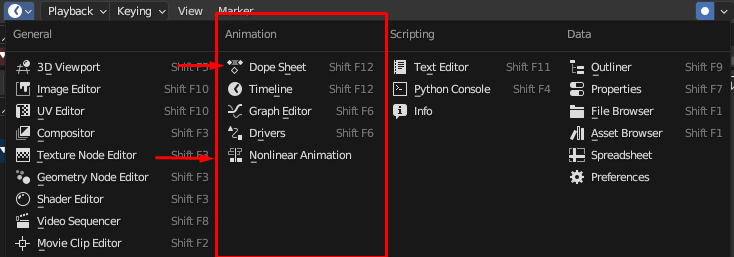
To store multiple animations successfully in your Dexr assets you will need two windows called DOPE SHEET and NON LINEAR ANIMATION. They are one of multiple views on animation data, but the only one you'll need for your basic setup. To switch between these views, look for the little dropdown icon on the top left of any blender window.
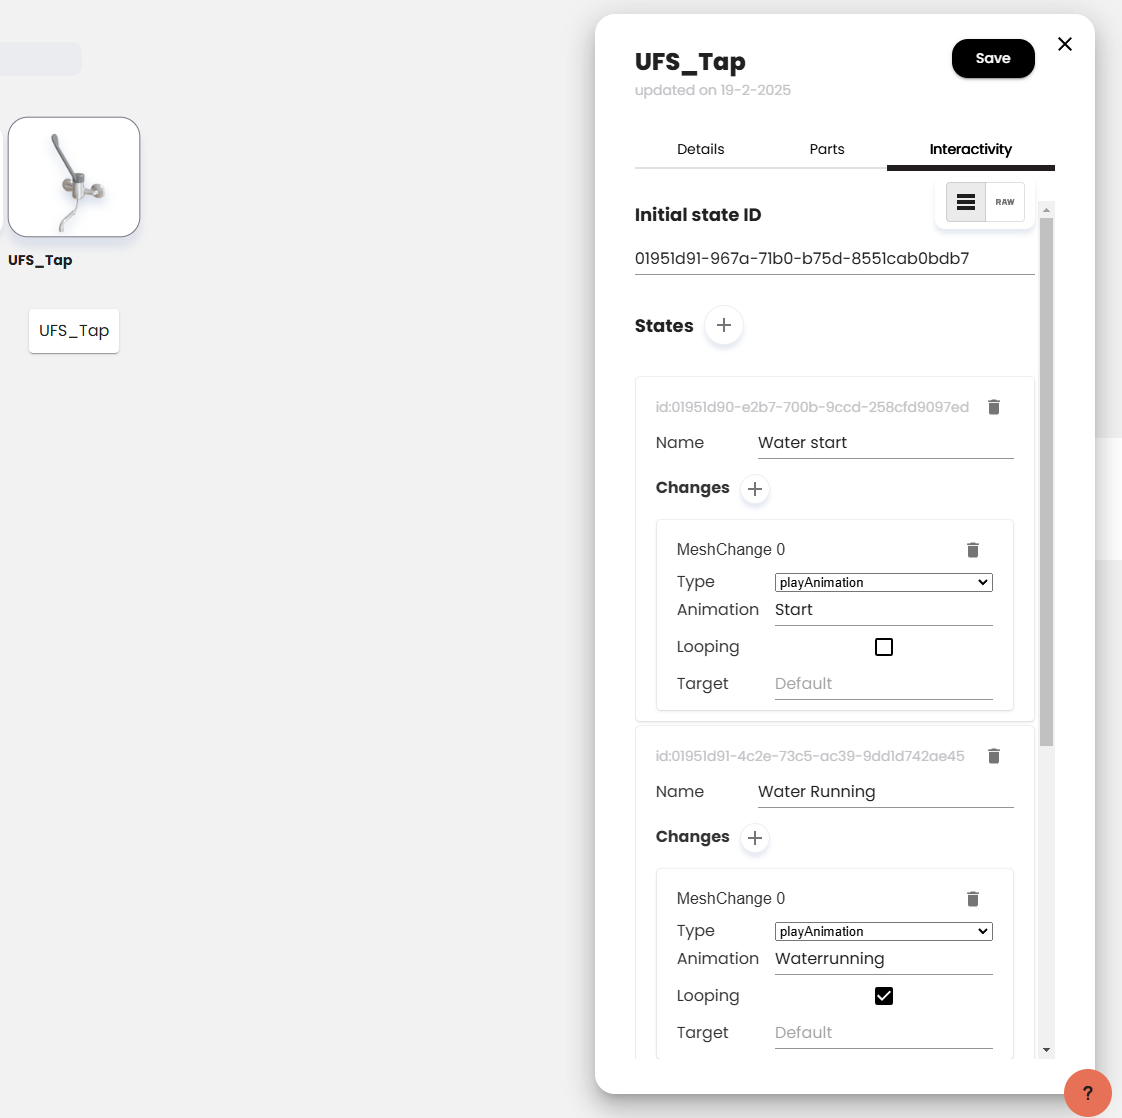
After a successful export, you'll have one more step in the Dexr portal itself, and that will be to add the animations as STATES in your asset interactivity editor. Choose the "playAnimation type" and type the name of the animation that corresponds to the animation layer created in Blender.
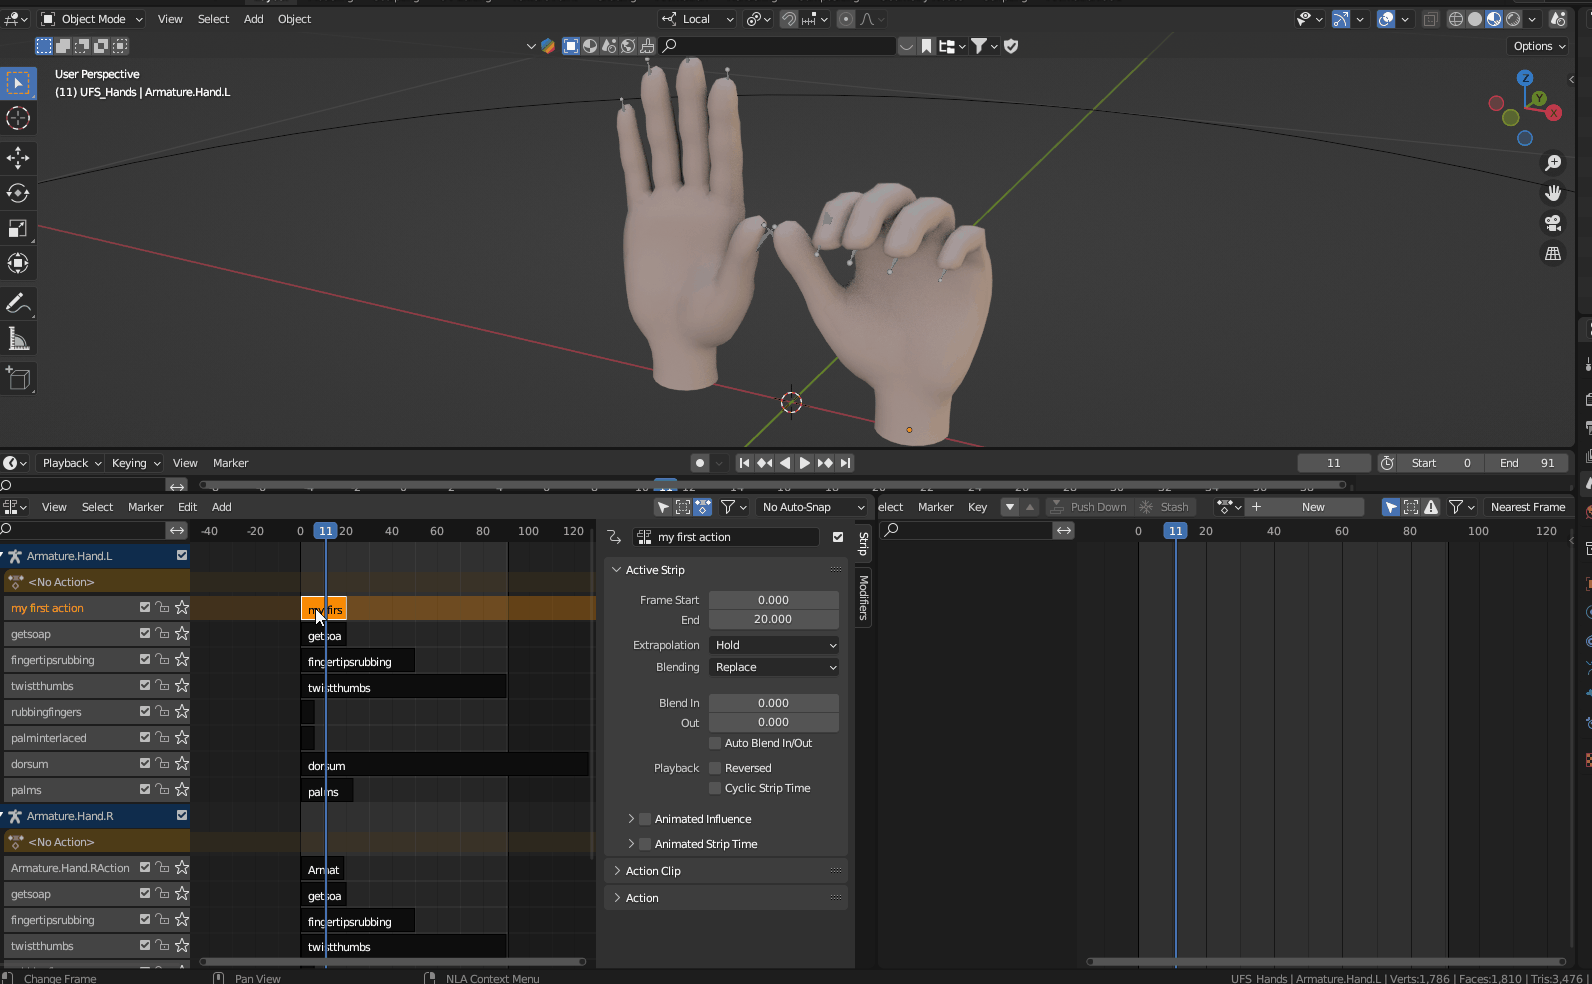
Step 1 - Create an action and add it to the NLA stack
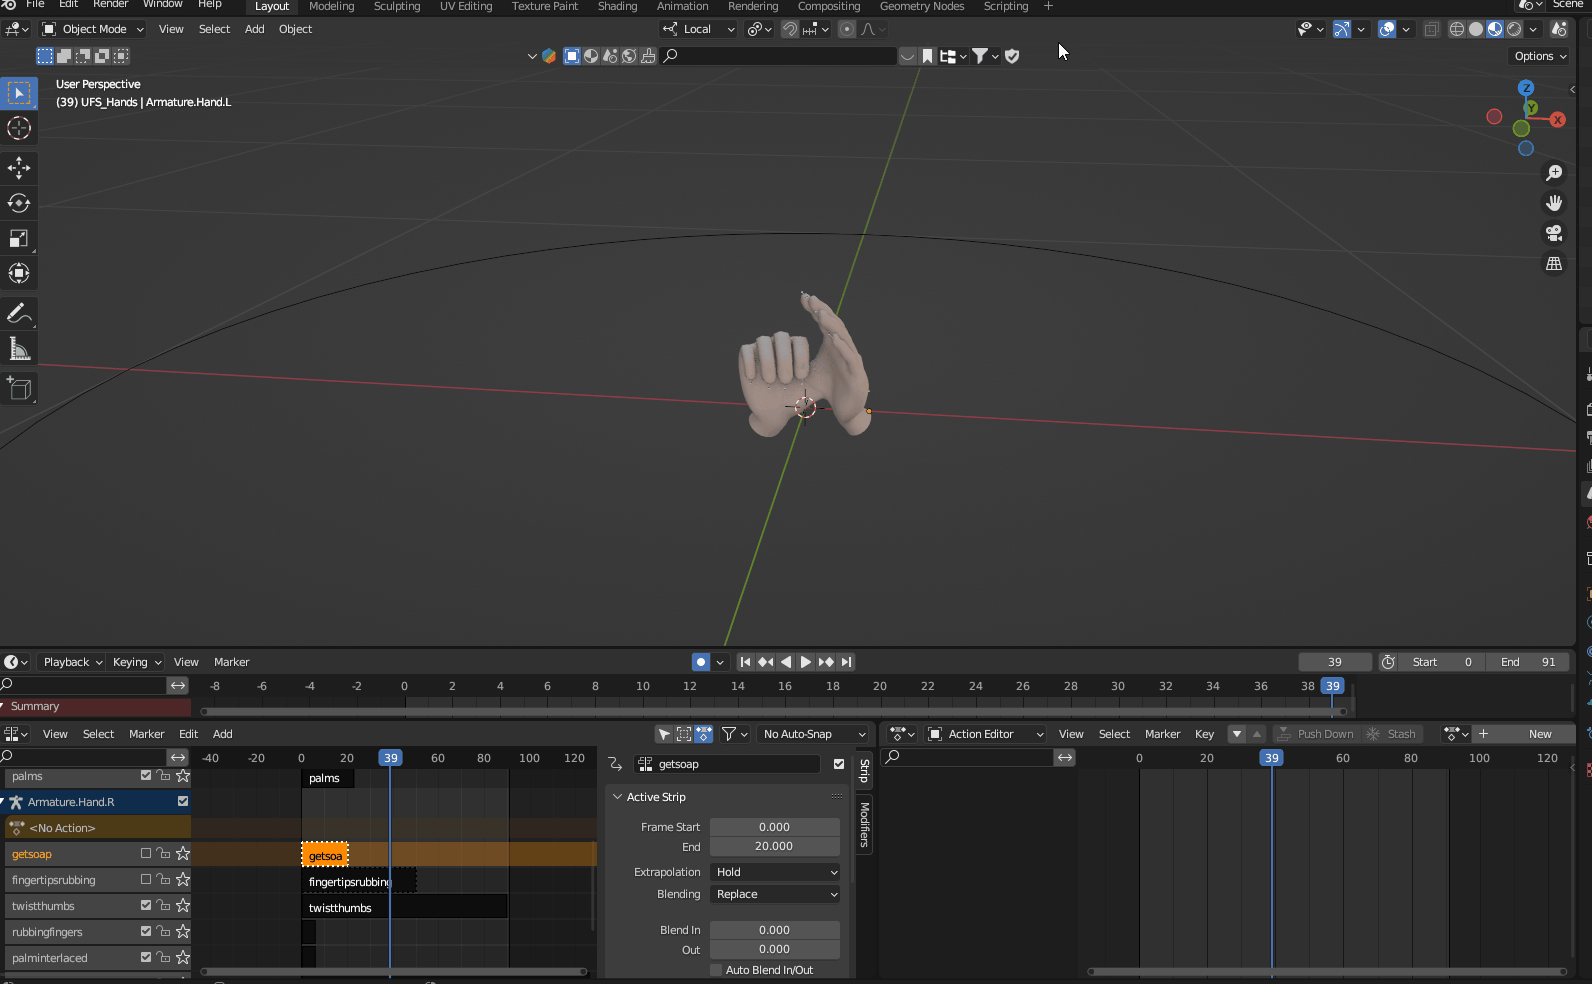
- Find the action editor, which is a submode of the DOPE SHEET editor.
- Find the Action select interface (somewhere in the middle) and either choose an existing or create a new Action.
- Animate to your desire within this action.
- Once finished, choose PUSH DOWN
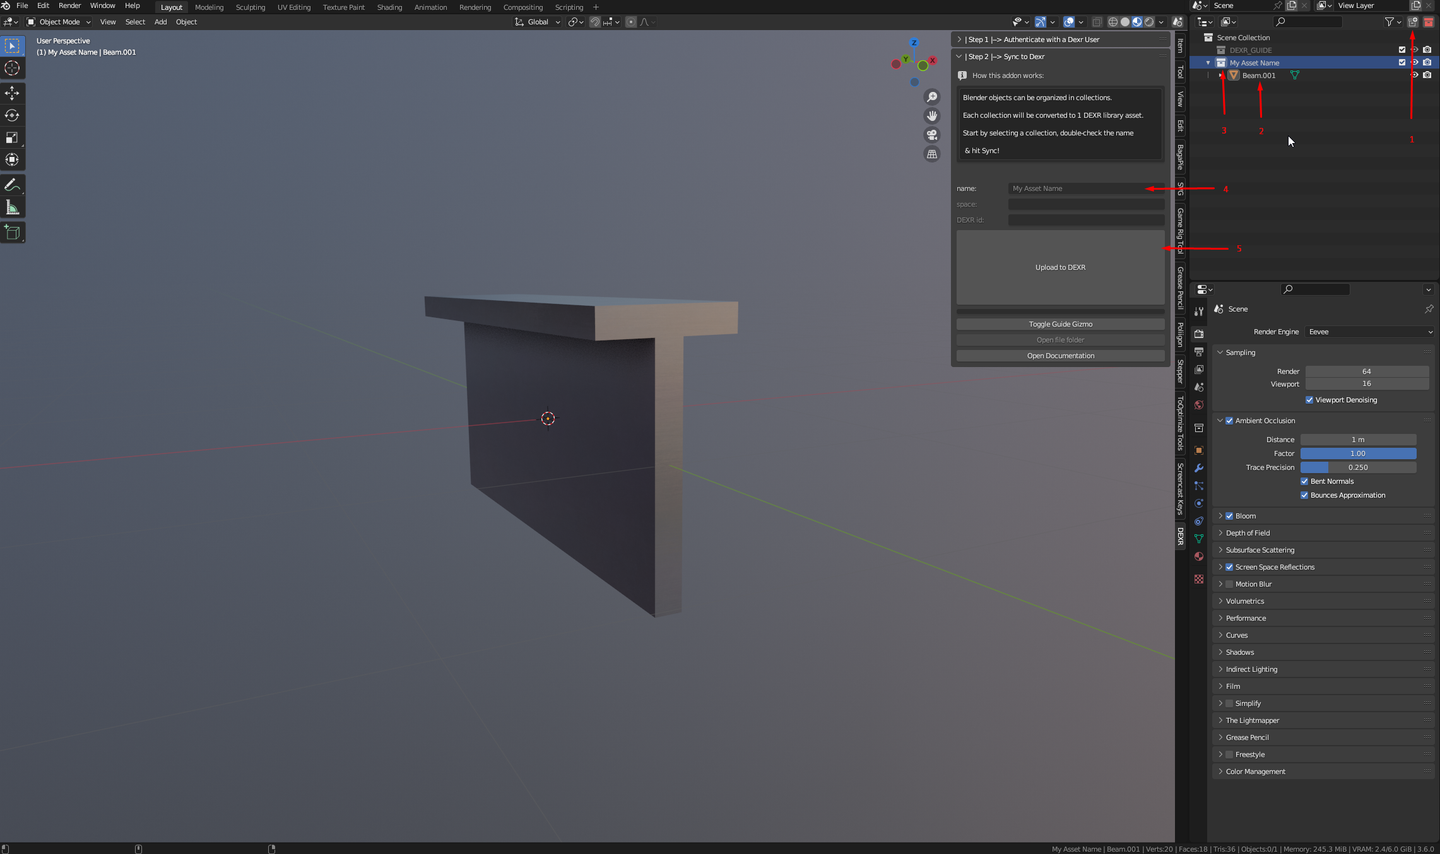
Step 2 - Upload to Dexr
See also "uploading assets"
Step 2.B - (Optional) Verify animation export
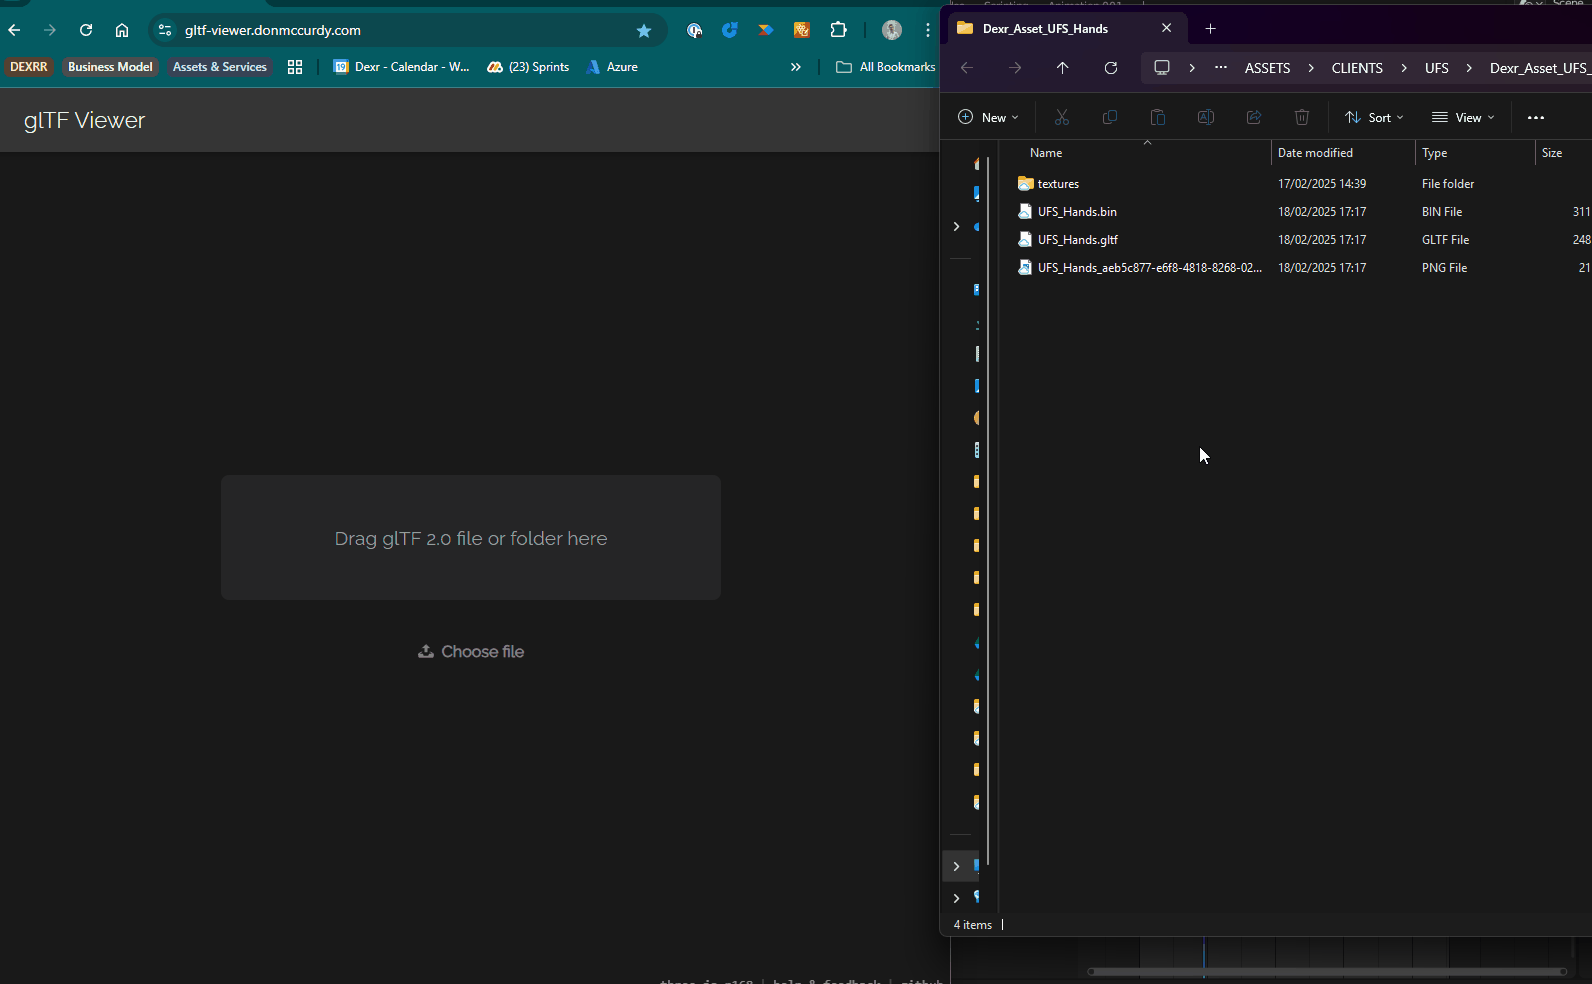
You can use an online GLTF viewer such as this one from Don McCurdy to see how your export will look like on any web platform.
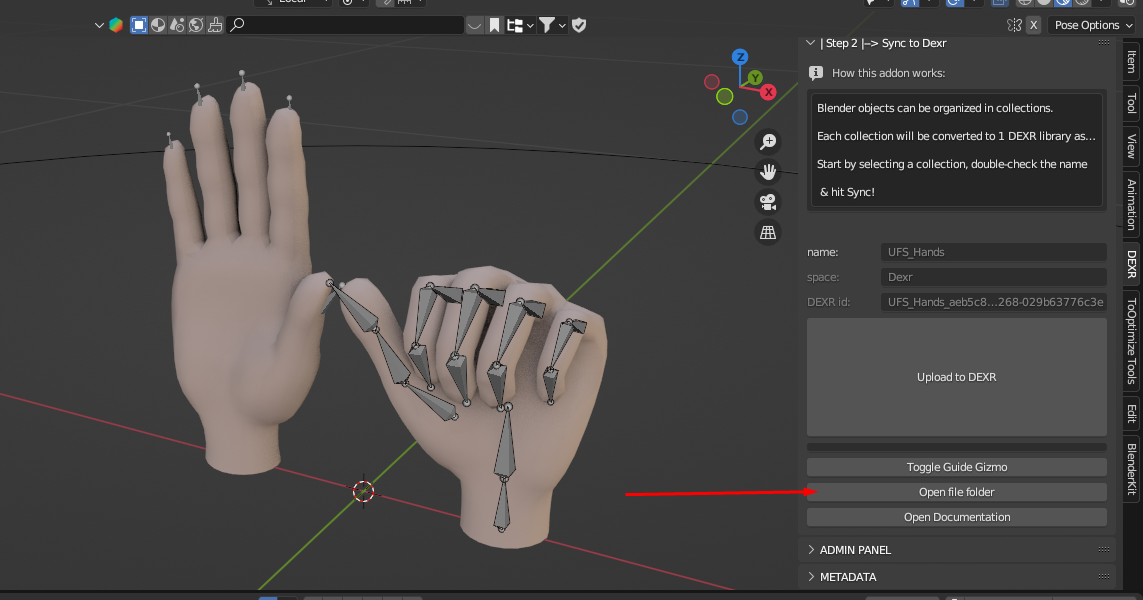
- Open the file folder with the Dexr export.
- Drag the .gltf file & .bin file & optionally the textures to the viewer
Step 3 - Add states in Dexr
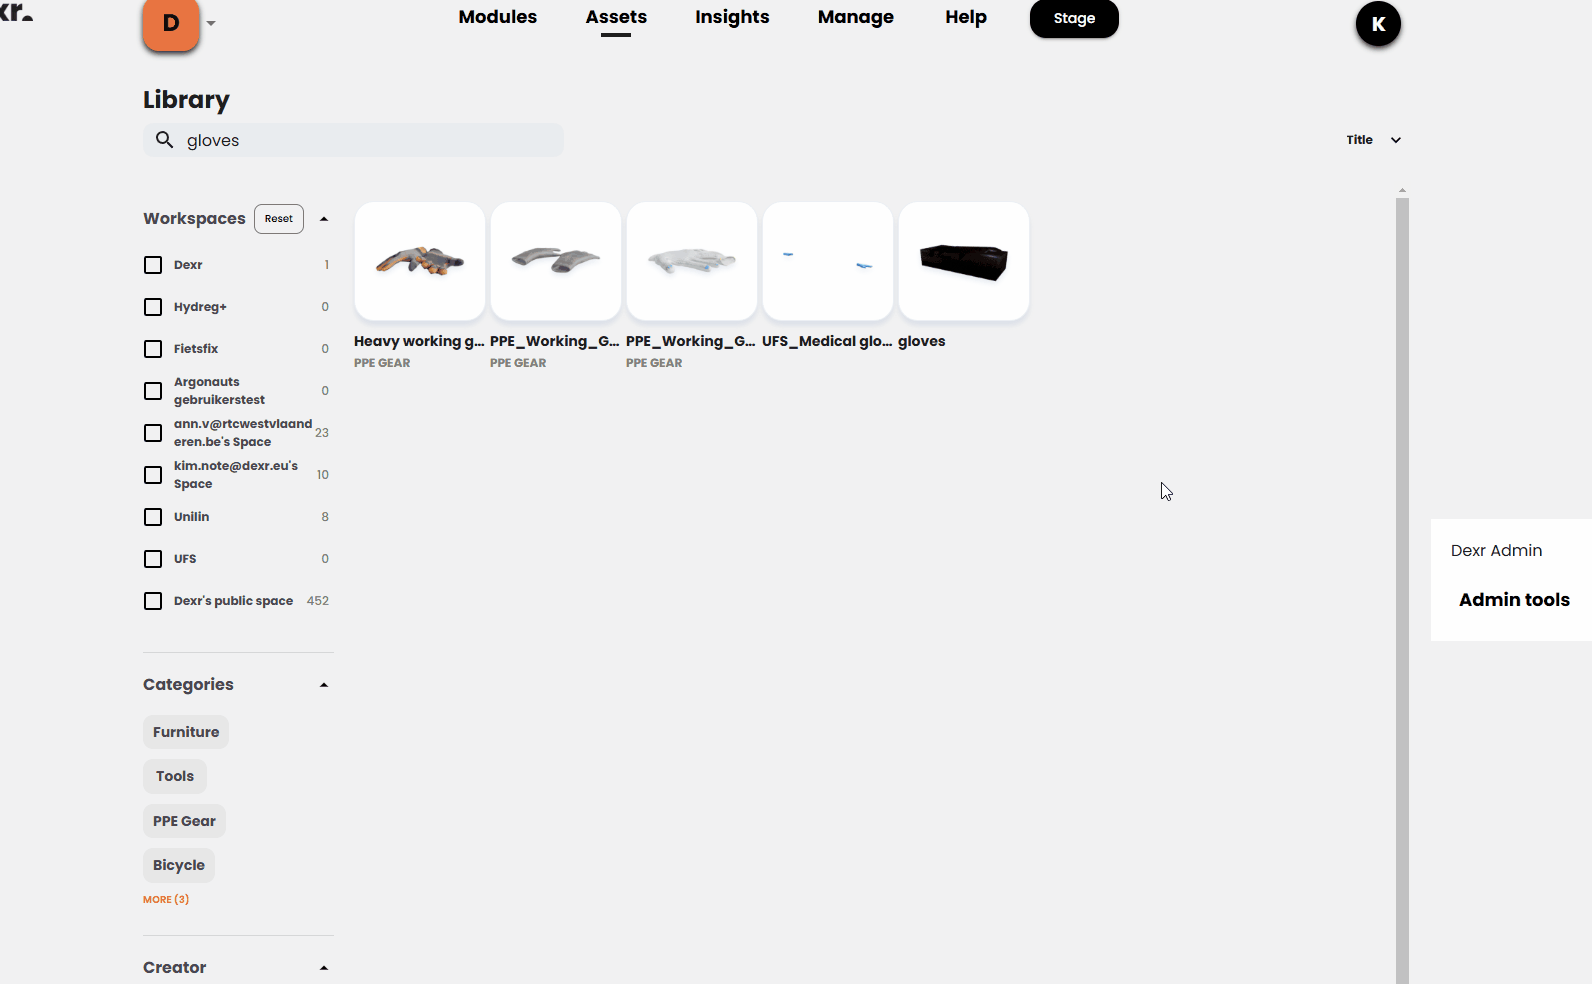
- Go to your asset library
- Select the asset, and go to the interactivity tab
- Add a state per desired animation.
- Type in the exact animation name as seen in the NLA stack in Blender.
- Don't forget to hit SAVE
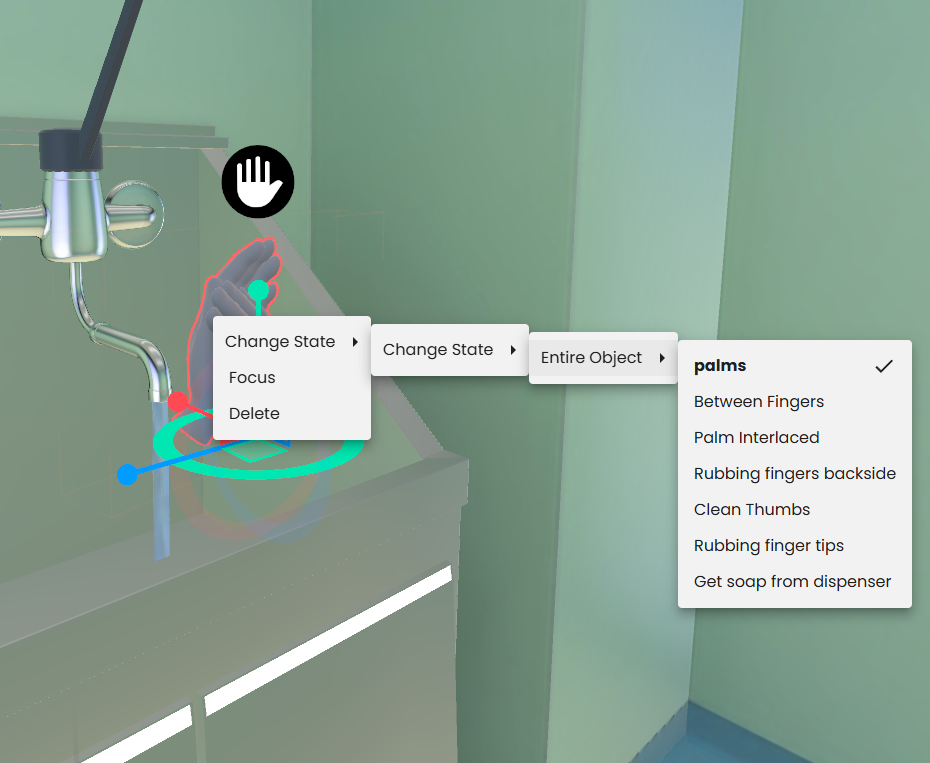
Step 4 - Test in the Stagebuilder
- Drag your asset onto a scene.
- Right click to see the "change state" menu
- Your created states will be listed there. If done correctly, your animation will play once selected.
- Now you can use the animation states in your steps flow!
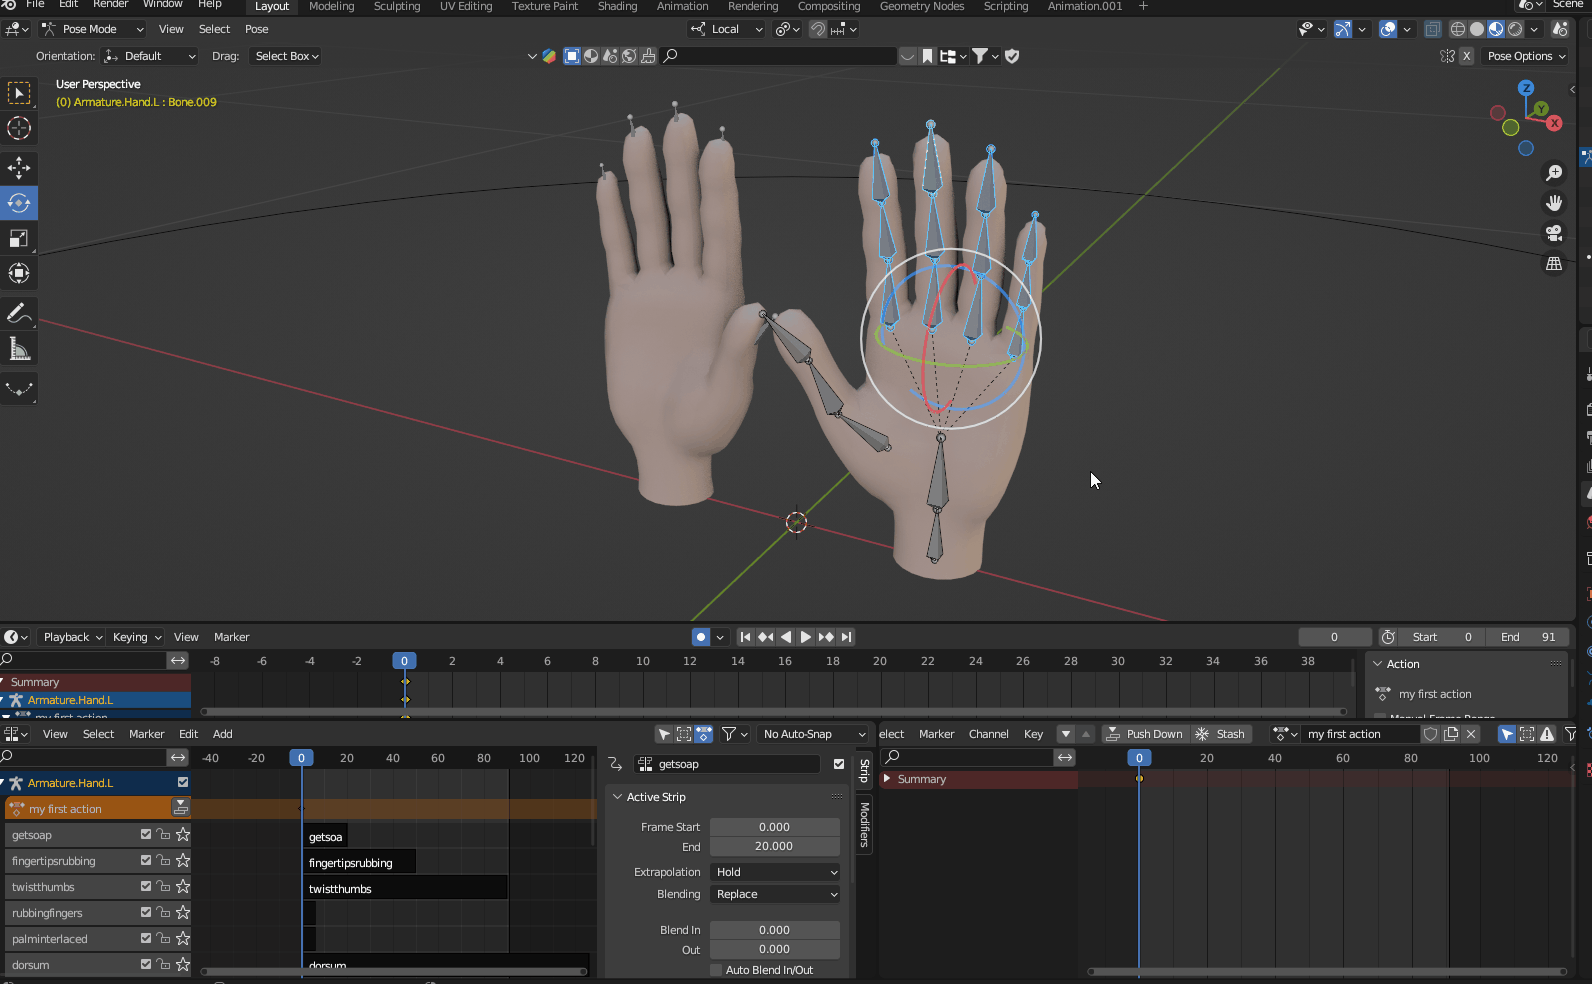
How to: Combining multiple objects into 1 animation
In this example, there are 2 separate objects and skeletons, one for each hand. We can have the hands be animated separately or together.
- to combine the 2 objects into 1 animation on export, rename the NLA tracks and the strips to exactly the same name. Case sensitive. Any mismatch will result in multiple animations.
- To combine 2 animations from 2 objects into 1, you therefor have to make sure 4 elements are named the same.
Note: A track is a grey row on the left, a strip are the black boxes on each track. A track can also consist out of multiple animation strips for more complex animations. 1 track = 1 exported animation, unless you name them the same ;)
How to: Working with shape keys
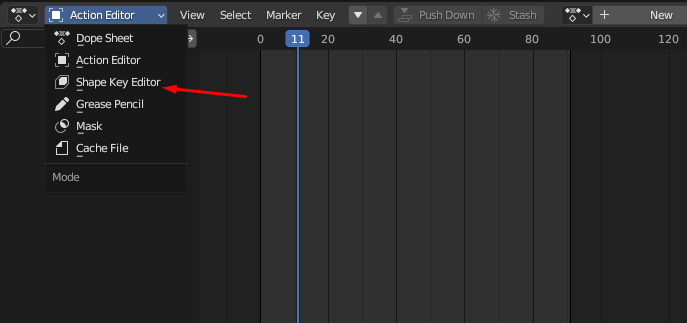
There is a separate sub-editor for shape keys found under the DOPE SHEET / ACTION EDITOR dropdown. Shape keys won't show up on the dope sheet or action view, but you are able to push them down to the NLA stack like those to.
Know that constraints aren't exported and will thus not work! (Letting an object follow a bone for example)
Instead use Object keyframe animation, armature animation or shape keys